This is a firm favourite in my house - easy to make, store and is simply yum! I usually make two of these at a time - one for the week and the other to wrap and freeze for the following week. this is such a time saver when you have hungry kids (and hubby) after school knowing I can get it out in the morning and it will be ready for their arrival home.
I am sure a few of you are thinking "eh? frozen sponge surely that cant taste as good?". WELL, let me tell you a defrosted sponge is perfectly good. When I was making celebration cakes for sale I often froze a Madeira based sponge for 24 hours as this assisted with carving cakes.
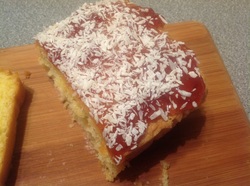
I do find that when freezing a lighter sponge such as this recipe that occasionally you can end up with a slightly sticky top of the cake however in this instance it will be covered with a generous dollop of jam & more desiccated coconut so I have never thought of it as an issue.
No sponge, frozen or otherwise will ever taste as light as fairy dust unless you eat it the day it was ceremoniously borne out of your oven so don't worry about a bit of freezing.
Right this is how I make mine:
**Just a quick note about my mixer - I have had this now 3 years in December & can not recommend this enough if your looking for an inexpensive mixer. As with most bowls you do need to scrape the side & bottom to free the batters etc but I recommend that anyway as it helps you get a feel for your different recipes & ensures a thorough combination of your ingredients. Mine has only just started to make unwelcome noises but after using it on average 6 days a week its lasted pretty well! I have my eye on the cream version **
METHOD -
I am sure a few of you are thinking "eh? frozen sponge surely that cant taste as good?". WELL, let me tell you a defrosted sponge is perfectly good. When I was making celebration cakes for sale I often froze a Madeira based sponge for 24 hours as this assisted with carving cakes.
I do find that when freezing a lighter sponge such as this recipe that occasionally you can end up with a slightly sticky top of the cake however in this instance it will be covered with a generous dollop of jam & more desiccated coconut so I have never thought of it as an issue.
No sponge, frozen or otherwise will ever taste as light as fairy dust unless you eat it the day it was ceremoniously borne out of your oven so don't worry about a bit of freezing.
Right this is how I make mine:
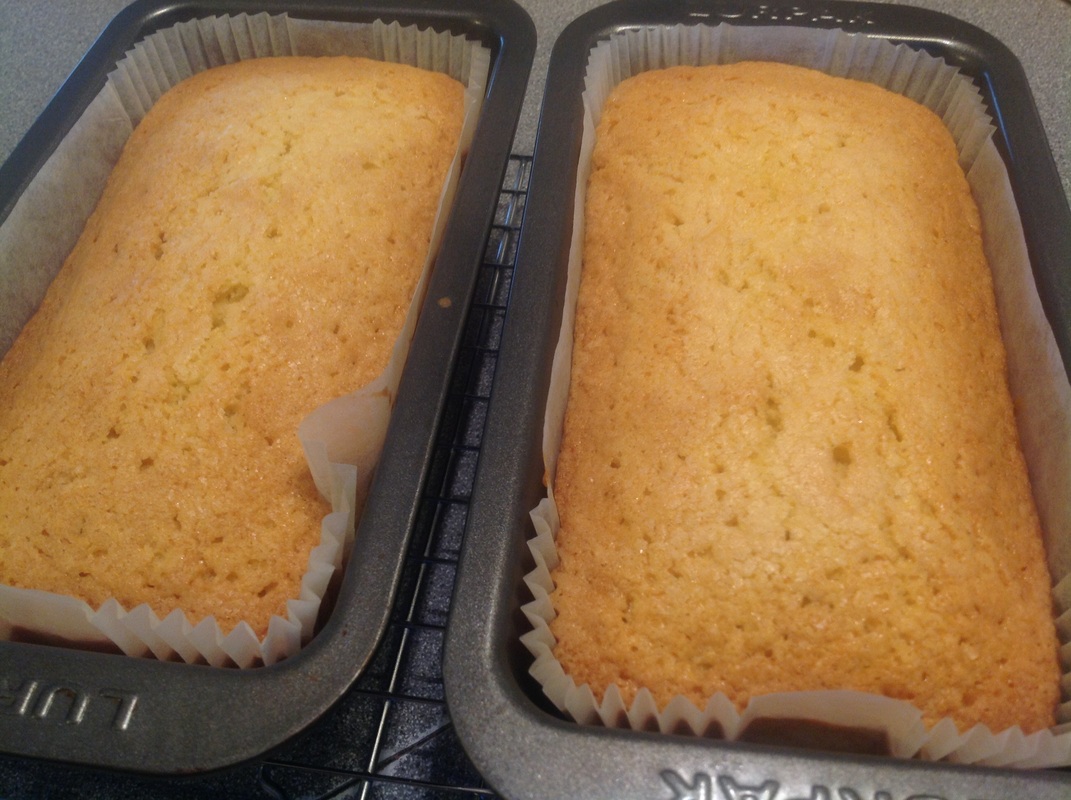
- x2 1lb loaf tins - I line mine using loaf tin liners from both Lakeland & Asda
- 10oz Self Raising Flour
- 10 oz Butter (I use the Best for Baking Butter by the supermarkets)
- 10oz Caster Sugar (Don't forget if you only have granulated sugar whizz it up in your blender to make the granules nice & fine)
- 5 medium free range eggs
- 1/2 tsp vanilla extract/vanilla bean paste
- 1 tbsp milk
- 1oz desiccated coconut plus extra for decoration
- Jam of your choice for decoration
**Just a quick note about my mixer - I have had this now 3 years in December & can not recommend this enough if your looking for an inexpensive mixer. As with most bowls you do need to scrape the side & bottom to free the batters etc but I recommend that anyway as it helps you get a feel for your different recipes & ensures a thorough combination of your ingredients. Mine has only just started to make unwelcome noises but after using it on average 6 days a week its lasted pretty well! I have my eye on the cream version **
METHOD -
- Preheat your oven to 160oC fan oven / gas mark 3
- Cream together the butter and sugar - be sure to stop and lift the mixture way from the bottom and sides of the bowl and remix (Trust Me! This little effort makes all the difference to a well combined and light textured cake)
- Add the vanilla essence/bean paste and remix until light and fluffy
- Add the flour, and your eggs - crack and whisk your eggs beforehand and leave to come to room temperature if you keep yours in the fridge (This reduces risk of curdling the butter)
- Whisk together on lower setting and if the mixture is a little thick (sometimes eggs as not the same size) then add the tbsp of milk to help loosen the batter
- Remove the bowl and add the desiccated coconut and fold into your mixture using a spatula - I LOVE my silicone spatulas as they are perfect for getting every last drop off the sides of the bowl.
- Split the mixture evenly between the two loaf tins & make sure it is evenly distributed in the tin
- Bake on the middle shelf for 55 mins - check after 30 mins that not catching (my oven is hotter on the right hand side so occasionally I switch multiple bakes around. The lower temperature and longer cooking time allowed a nice even rise on these cakes without splitting the top.
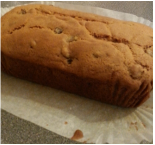
- Leave to cool in the tins for 15 mins then remove from tin onto a cooling rack. Leave the cakes in the cake liner.
- I tend to cut mine into three, wrap in clingfilm and then foil but only when completely cool. I freeze mine for no more then 10 days but they NEVER, EVER last that long in my house!!
 |  |
| | | |
 RSS Feed